Building an AppSec Program with Qualys WAS – Configuring a Web Application or API: Crawl Settings

Table of Contents
Qualys Web Application Scanning (WAS) stands out as the industry’s leading Dynamic Application Security Testing (DAST) solution. Delving deeper into these settings is crucial for effectively harnessing its potential to uncover vulnerabilities. Scan coverage is greatly influenced by the crawl settings, making it imperative to grasp the intricacies of these configurations.
Exploring Crawl Settings
For web application scanning to be successful and efficient, accurate crawling is a crucial aspect for which having the ability to customize is critical. Enter the world of crawl settings and multiple features that empower you to customize the path your scanning process takes through your website. In this blog, we’ll explore the various crawl settings available when adding/updating your web application configuration in WAS and understand what each option entails and how it impacts your website’s scanning process.
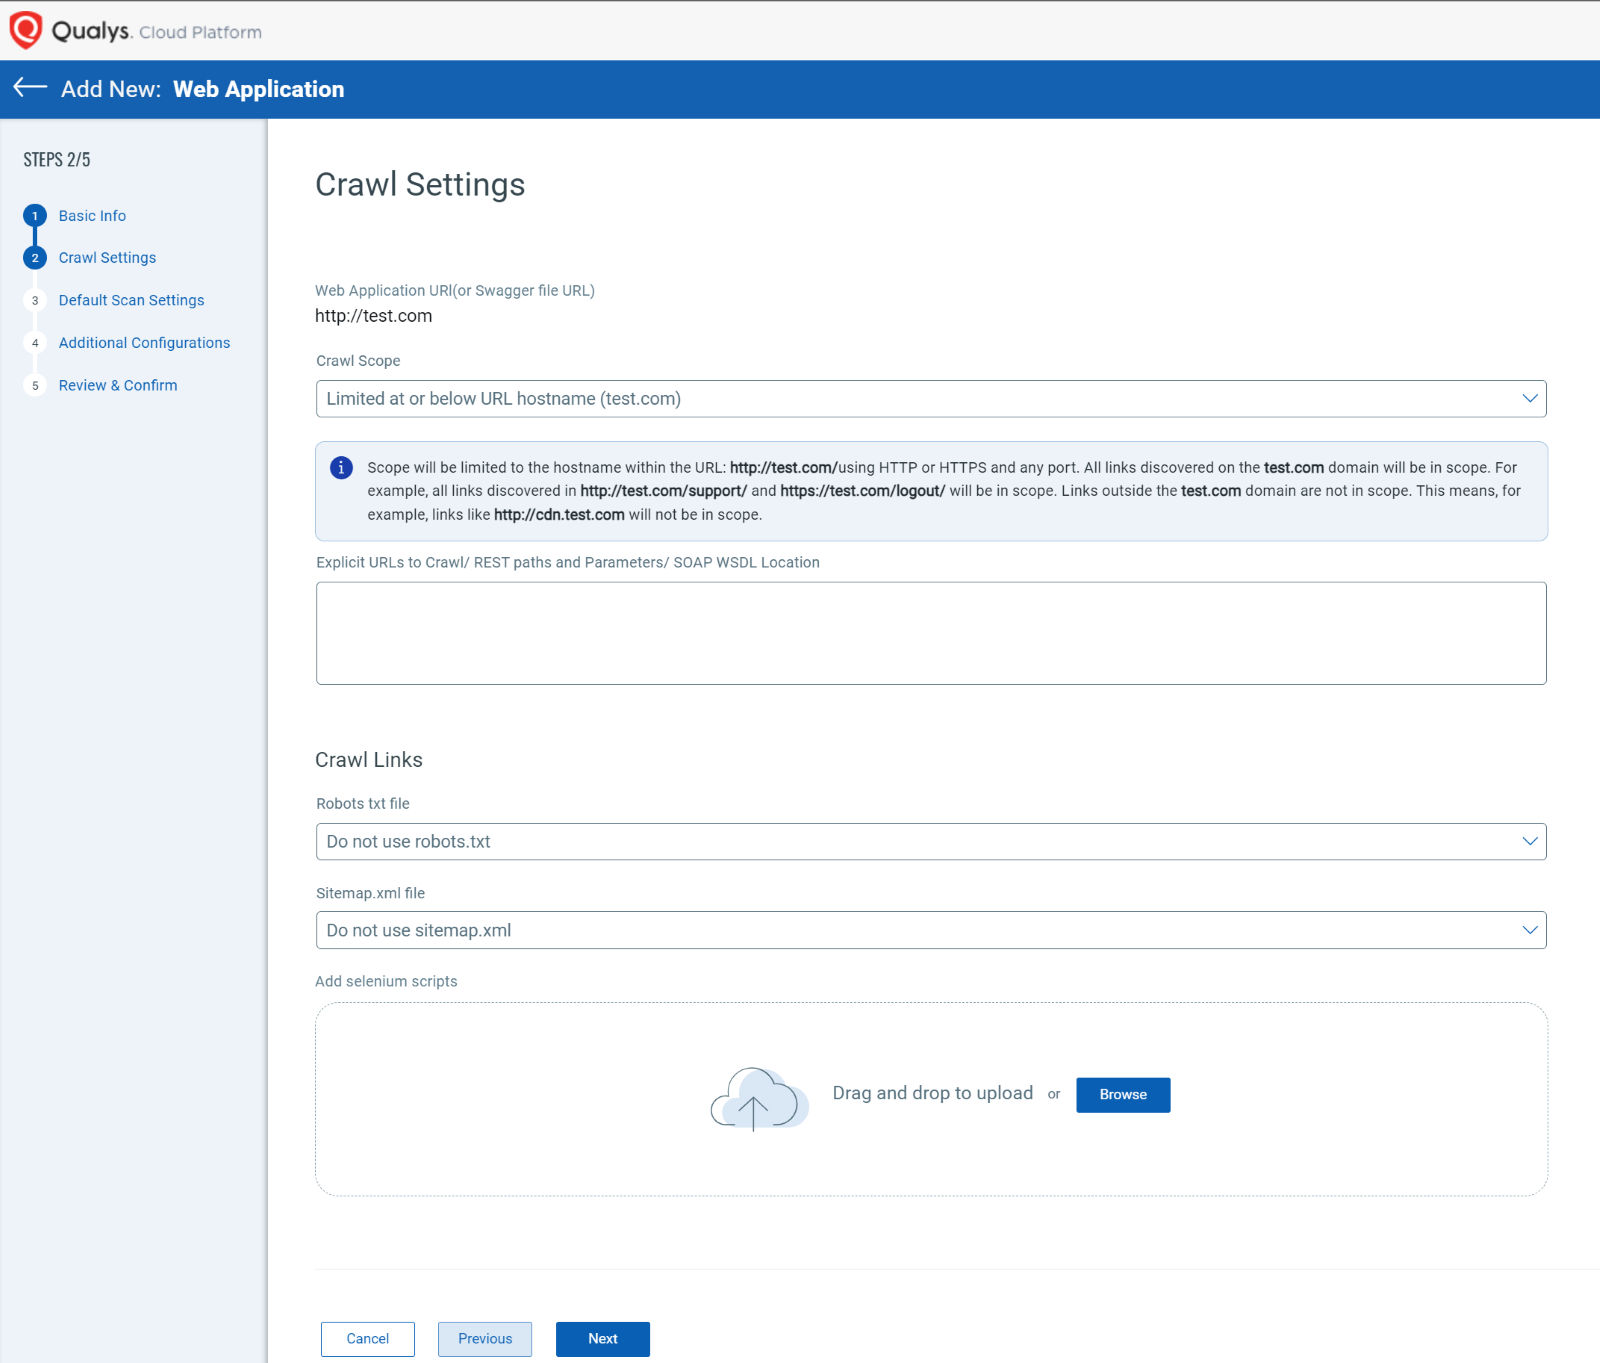
Crawl Scope
Limited at or below URL hostname:
Imagine your website is a vast city, and the URL hostname is its main address. Choosing the “Limited at or below URL hostname” option means your scanning process will stick to exploring within the walls of this primary domain. For instance, if your starting URL is http://www.test.com, the crawler will diligently crawl all links within the www.test.com domain. This includes all subdirectories, such as http://www.test.com/support and https://www.test.com:8080/logout. All links found at HTTP, HTTPS, or any unconventional port will be crawled.
Links That Will Be Crawled:
- All links within the www.test.com domain.
- All links starting with http(s)://www.test.com/* (using * as a wildcard).
Links That Will Not Be Crawled:
- Sub-domains of www.test.com, such as http://www2.test.com or http://sub1.test.com/.
Limit to content located at or below URL subdirectory:
Now, imagine your website is like a library with different sections. Choosing the “Limit to content located at or below URL subdirectory” option means your scanning process will focus on a specific section of the library. If your starting URL is http://www.test.com/news/, the crawler will navigate through all links starting with http://www.test.com/news. Even if the paths lead to subdirectories, like http://www.test.com/news/headlines or https://www.test.com:8080/news/, the crawler will discover them. Please note that a trailing forward slash “/” is needed at the end of your target subdirectory.
Links That Will Be Crawled:
- All links starting with http://www.test.com/news/.
Links That Will Not Be Crawled:
- Links like http://www.test.com/agenda.
- Links from domains outside the specified subdirectory, like http://www2.test.com.
Limit to URL hostname and specified sub-domain:
Continuing our story, picture your website as a network of interconnected hubs. Choosing the “Limit to URL hostname and specified sub-domain” option allows your scanning process to traverse the primary domain and a designated sub-domain. Suppose your starting URL is http://www.test.com/news/, and the sub-domain is sub1.test.com. In that case, the scanner will crawl into both www.test.com and sub1.test.com, along with their respective sub-domains. This encompasses links like http://www.test.com/support, https://www.test.com:8080/logout, http://sub1.test.com/images/, and even http://videos.sub1.test.com.
Links That Will Be Crawled:
- All links discovered within www.test.com and sub1.test.com and their sub-domains.
Links That Will Not Be Crawled:
- Links whose domain doesn’t match the web application URL hostname or isn’t a sub-domain of sub1.test.com, such as http://videos.test.com.
Limit to URL hostname and specified domains:
Finally, think of your website as a garden with carefully tended patches. Choosing the “Limit to URL hostname and specified domains” option allows your scanning process to explore only the main domain and specific patches (domains), even if those other “patches” are in different domains. If your starting URL is http://www.test.com/news/, and the specified domains are www.anothersite.com and moresites.com, the crawler will roam through www.test.com, www.anothersite.com, and moresites.com, along with their respective links.
Links That Will Be Crawled:
- All links discovered within www.test.com, www.anothersite.com, and moresites.com.
Links That Will Not Be Crawled:
- Links whose domain doesn’t match the web application URL hostname or the specified domains, such as http://videos.test.com or http://www.other-sites.com.
Explicit URLs to Crawl/ REST paths and Parameters/ SOAP WSDL Location:
When it comes to web application scanning, there are scenarios where you might want to specifically target certain URLs that might not be directly linked within the application. Enter the world of Explicit URLs, a powerful tool that enables you to guide the scanning process exactly where you want it to go. This feature is especially handy for cases like email-based registration, where a user clicks a link in an email to access a particular page within your application.
To get started with Explicit URLs, here are a few key things to keep in mind:
- Linking Consistency: The URLs you specify for explicit crawling must align with the scope you’ve selected for your scanning. Whether you’ve limited the scanning to a hostname, sub-directory, specific sub-domain, or other domains, ensure the explicit URLs match the criteria.
- Authentication Matters: In the case of an authenticated scan, it’s crucial to include the login link as the first explicit URL. This ensures that the scanning process covers authenticated sections of your web application effectively.
- URL Length: Each explicit URL can be up to 2048 characters long. This provides ample space to include detailed and specific URLs for scanning.
- HTTP or HTTPS: Explicit URLs must be valid HTTP or HTTPS URLs to ensure successful crawling.
Best Practice Tip! Not sure what crawl scope to use? Start with the default “Limit at or below URL hostname.” Any subdomains or external domains that should be considered for your scope refinement will be reported in your scan report and the WAS Catalog.
Crawl Links:
Another powerful feature that contributes to the accuracy and comprehensiveness of your web application scanning is the ability to configure how your scan interacts with various links. The following are additional optional configurations that can ensure full scan coverage:
- Robots.txt File: The robots.txt file is a standard used to guide web spiders and robots about which parts of a website to crawl or avoid. With the “Crawl all links and directories found in the robots.txt file” option, your scan will respect the directives in the robots.txt file. Separately, there is an option to exclude the specified links or directories in the robots.txt file from crawling.
- Sitemap.xml File: Sitemap.xml is an XML file that provides a map of all available URLs on a website. By selecting the “Crawl all links and directories found in the sitemap.xml, if present” option, you ensure that your scan incorporates the URLs listed in the sitemap.xml, enhancing the scan’s coverage.
- Add Selenium Scripts: You can leverage custom Selenium scripts for more advanced and tailored scanning scenarios. These scripts, created using the Qualys Browser Recorder extension, allow you to navigate your web application in a way that simulates user interactions. You can upload these scripts and configure them to run during the scan.
- Upload Scripts: You can add multiple Selenium scripts by clicking “Add Script” and choosing a file from your local system or dragging and dropping it into the Import File window.
- Triggering the Script: Specify a URL or a regular expression (in PCRE format) that triggers the execution of your custom script. This ensures that the script runs at the appropriate point during the scanning process.
- Post-Authentication Script: If your web application requires form authentication, you can run the script only after the form authentication has been successfully completed, adding an extra layer of precision to your scanning.
- Validation Regular Expression: You can define a validation regular expression (in PCRE format) that confirms the successful execution of your custom script. This ensures that the script’s intended actions are as expected.
Best Practice Tip! Qualys Browser Recorder can be used on both Chrome and Microsoft Edge browsers for widespread compatibility.
At this point, you can click “Next” to be taken to Step 3 in manually configuring your web application and APIs –Default Scan Settings. Please join us for our next blog in this series, where we will cover Default Scan Settings in detail and provide even more best practices for getting the most out of Qualys WAS.
Next Article in Series:
https://blog.qualys.com/product-tech/2023/12/04/building-an-appsec-program-with-qualys-was-introduction-and-configuring-a-web-application-or-api-default-scan-settings